7 More Product Photography Tips
Whether you’re marketing for your own business or just taking up a new hobby, there are lots of reasons to improve your photography skills. We’ve come up with a few more photography tips from the Sunset Hill Stoneware team to get your photos picture perfect. This and our other series of product photography tips will help you improve your skills with time.

These tips aren’t rules. They aren’t something that you have to follow every single time you pull out your camera. However, they’re the building blocks to understanding good photography and the foundation for anyone looking to sell their products or skills.
1. Reduce Camera Shake
We’re experts on camera shake because it’s a mistake we make all the time here at SHS. It’s a problem we don’t usually show on our social media pages. No matter what though, shaky cameras make for blurry photography, and that often comes down to human error.
Consider investing in a tripod. They tend to be fairly affordable, and they’re priceless when it comes to taking quality photos. Tripods reduce the risk for human error while still allowing you to take photos from any angle you want.
If you plan on using your camera for filming, a tripod is a must. People’s arms tend to move when they’re holding up a camera, especially for longer periods. Tripods take that shakiness out of the equation so you don’t have to worry about blurry or shaky images.
2. Learn About Aperture
 In photography, aperture refers to how wide or narrow the opening of your lens is. That’s what allows light to come into your camera lens. Adjusting your aperture allows you to adjust the amount of light On the camera, aperture is measured in what’s called f-stops, paired with a number between 1 and 22. A good rule of thumb is that the smaller the number on the f-stop, the wider the opening.
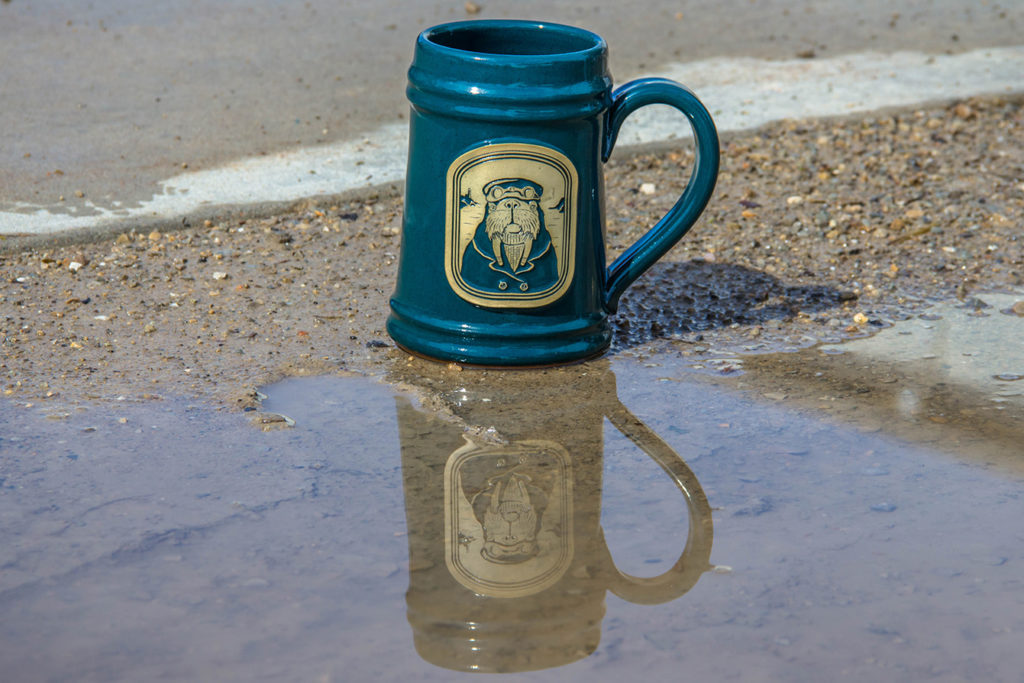
If you’re taking portrait photos, having a wide aperture is your best friend. A wide aperture lets the camera focus on your subject, blurring out anything else that might be in the background. Think f/8 or wider. That’ll keep the person, pet or product you’re posing from getting lost in the clutter of a busy scene. That’s what we did for one of our first orders in Old Glory in order to show what it looked like in outdoor lighting.
On the other hand, if you’re trying to capture the unforgettable landscape overlooking a place like the Grand Canyon, keep the aperture narrow. This helps capture the sheer vastness of the scene without making the image seem flat or unimpressive.
3. Familiarize Yourself with Shutter Speed
Shutter speed refers to how fast the shutter on your camera closes when you take a picture. Most cameras measure it in fractions of a second. Typically, the higher the shutter speed, the less time there is for light to get into your lens.
Faster shutter speeds are better for capturing subjects in motion without any blurs. They’re also good tools to use when you’re taking photos outdoors in bright sunlight. On the other hand, lower shutter speeds can make for incredible special effects, especially when you’re snapping photos at night with shots involving car headlights, fireworks and other fast-moving objects. You might also want to use slightly lower shutter speeds in situations where the lighting isn’t as strong.
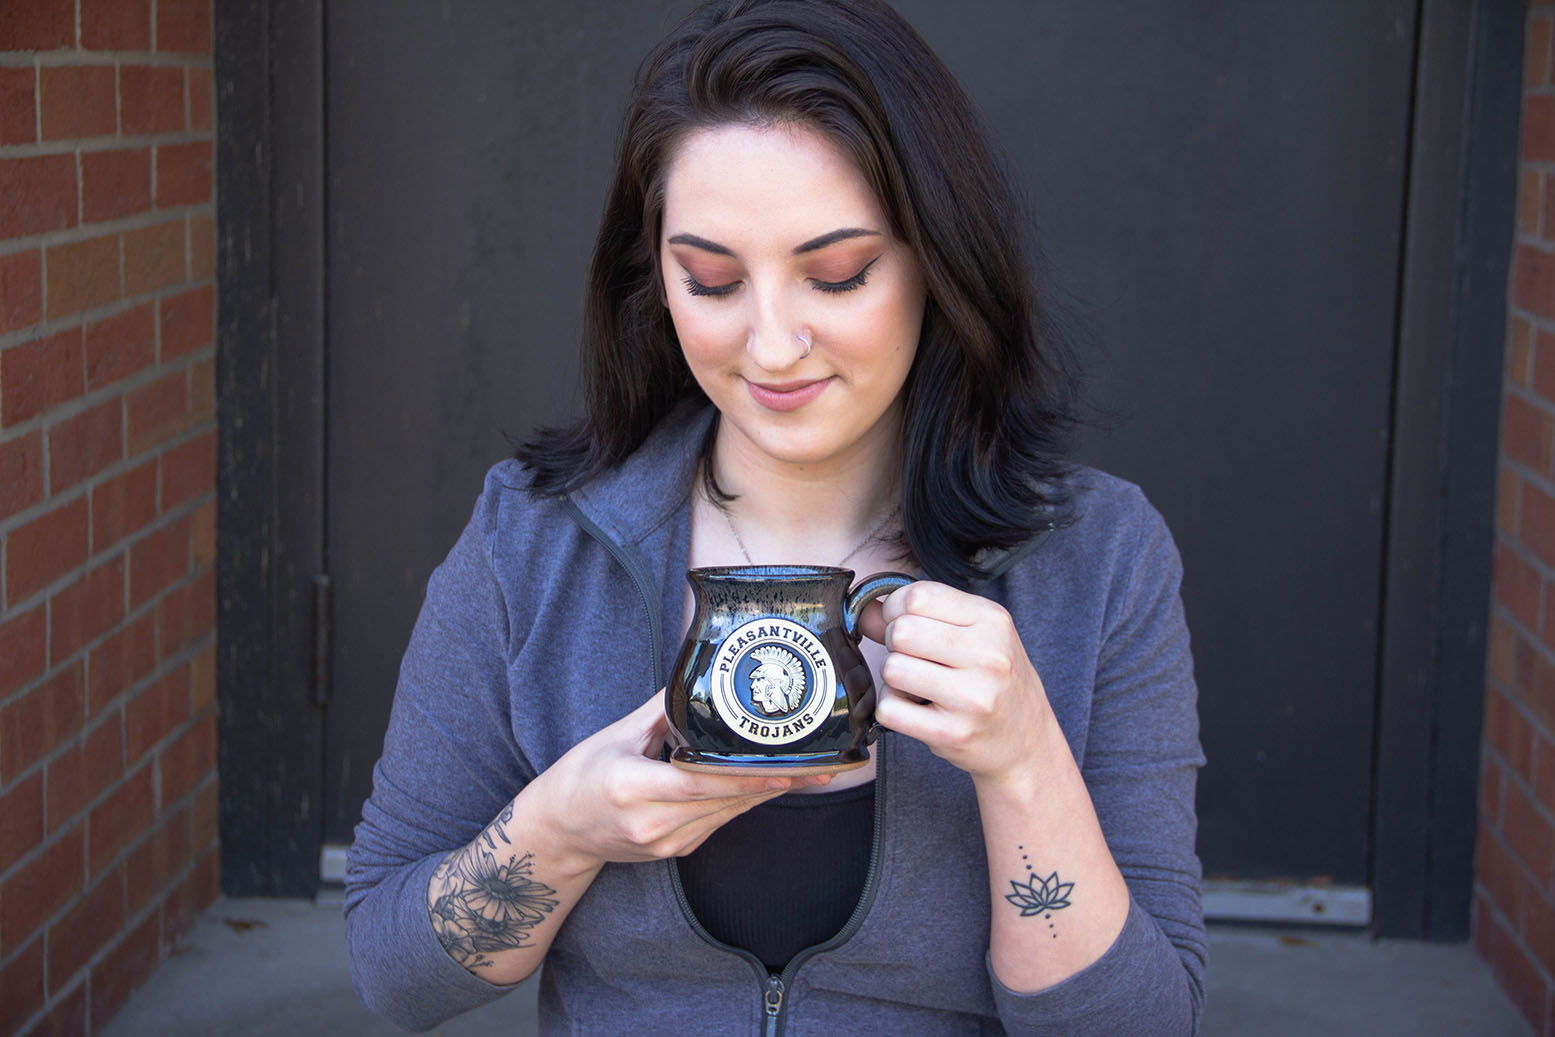
Using different shutter speeds is helpful when Sunset Hill Stoneware’s photography team is taking lifestyle photography. We like to use higher shutter speeds when we’re making our coworkers model, or when we’re posing our mugs outdoors to get a change of scenery.
4. Don’t Use Flash Indoors (but Outdoors is Okay)
Flash is not your friend. Not only can it make your subjects squint, but it can also cause red eye and make everything in your photos appear washed out and give them a vibe some people find unsettling. This goes double for situations where you’re in normal or even dim lighting. In fact, it’s safe to say you should just keep the flash off for any photos you’re taking inside or in a controlled environment.
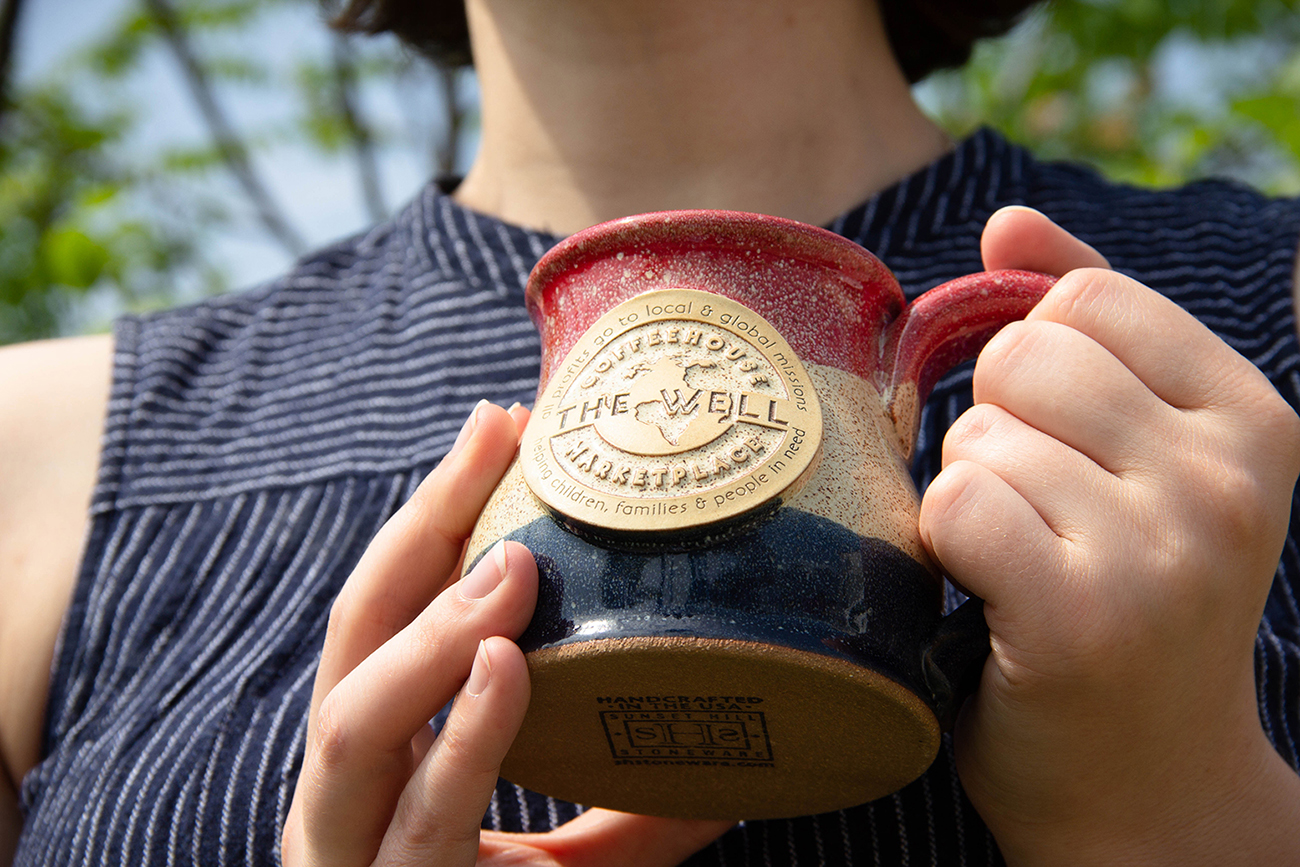
On the other hand, flash is great when you’re taking portraits outside or with other natural lighting. It gets rid of shadows around people’s faces and gives them a more youthful appearance. Such was the case when we posed one of our account specialists with mugs for our Fundraising Program. It helped her face stand out perfectly against the shaded backdrop of our office. It also worked when we took shots on a cloudy day of steins in our Deep River Haze glaze.
The exception to this tip is if you have other flash equipment to even out the lighting. Flash bulbs or soft boxes make the lighting more even, so you can use the flash on your camera pretty much anywhere you’d like if you’re using them in your setup. We like to do this when we’re doing indoor photo shoots or using our light box. Among other things, it lets us get better lighting on our custom beer steins and coffee mugs so the details can really stand out.
5. Composition Changes Everything

Good photography starts and ends with good composition. You can have a beautiful vista of a hiker overlooking the Flatirons in Colorado where the lighting is just right, but if the composition isn’t good, the photo will be boring to look at.
When our team is taking product photography or lifestyle shots with people, we like to follow the rule of thirds. We’ve mentioned this rule before, but it’s just as important as ever. Divide the space in your shot along two sets of three vertical and horizontal imaginary lines. Some cameras even have these lines built into the screen when you’re taking the photo, so you can line up your shot with them. There are very few hard and fast rules for composition, but the rule of thirds is one of the most basic to remember if you’re still learning the ropes.
However, there is more than one way to set your photos up for good composition. Don’t be afraid to try other techniques, including experimenting with symmetry, leading the eye along lines or patterns and using objects as framing tools. You might even use negative space around the subject of your photos to make them appear larger than life or incredibly small. Be on the lookout though–these composition tools all around you, in places you might not expect.
6. Skill Matters More Than Equipment
Just starting out with photography? Maybe hold off on buying that $3,000 camera you’ve been eyeing. It will probably take big, crystal clear photos and have loads of bells and whistles for you to use, but it’s better to know how to use them first.
At the same time, you can only do so much with that $12 camera you found in the electronics department. Their abilities are limited, and they tend to break quickly. But, they work in a pinch and are a good choice if you need to pack light. Just don’t expect to do an entire photo shoot with one.
If you plan on getting a camera for work and already know the basics of photography, look into a DSLR camera. Most DSLR cameras let you adjust the settings to your liking and even allow you to set everything manually. However, their automatic adjustments also tend to be pretty reliable if you’re still learning how to use more sophisticated effects. They come in huge price range, from around $100 to several thousand dollars depending on the model. However, it’s also not difficult to find them secondhand in good condition either, so you can still learn how to use the camera without having to take out a second mortgage on your house.
7. Learn the Rules, Then Break Them
Art would be boring if every piece looked the same. Once you understand these photography tips, don’t be afraid to experiment and go against them. However, make sure you use them as building blocks first so you know what they are first.
It might result in some photos you don’t like, but it’s the best way to find your own style and take unforgettable shots you’ll can use for years. Use these as the starting point, then start practicing and getting better with every photo you take.